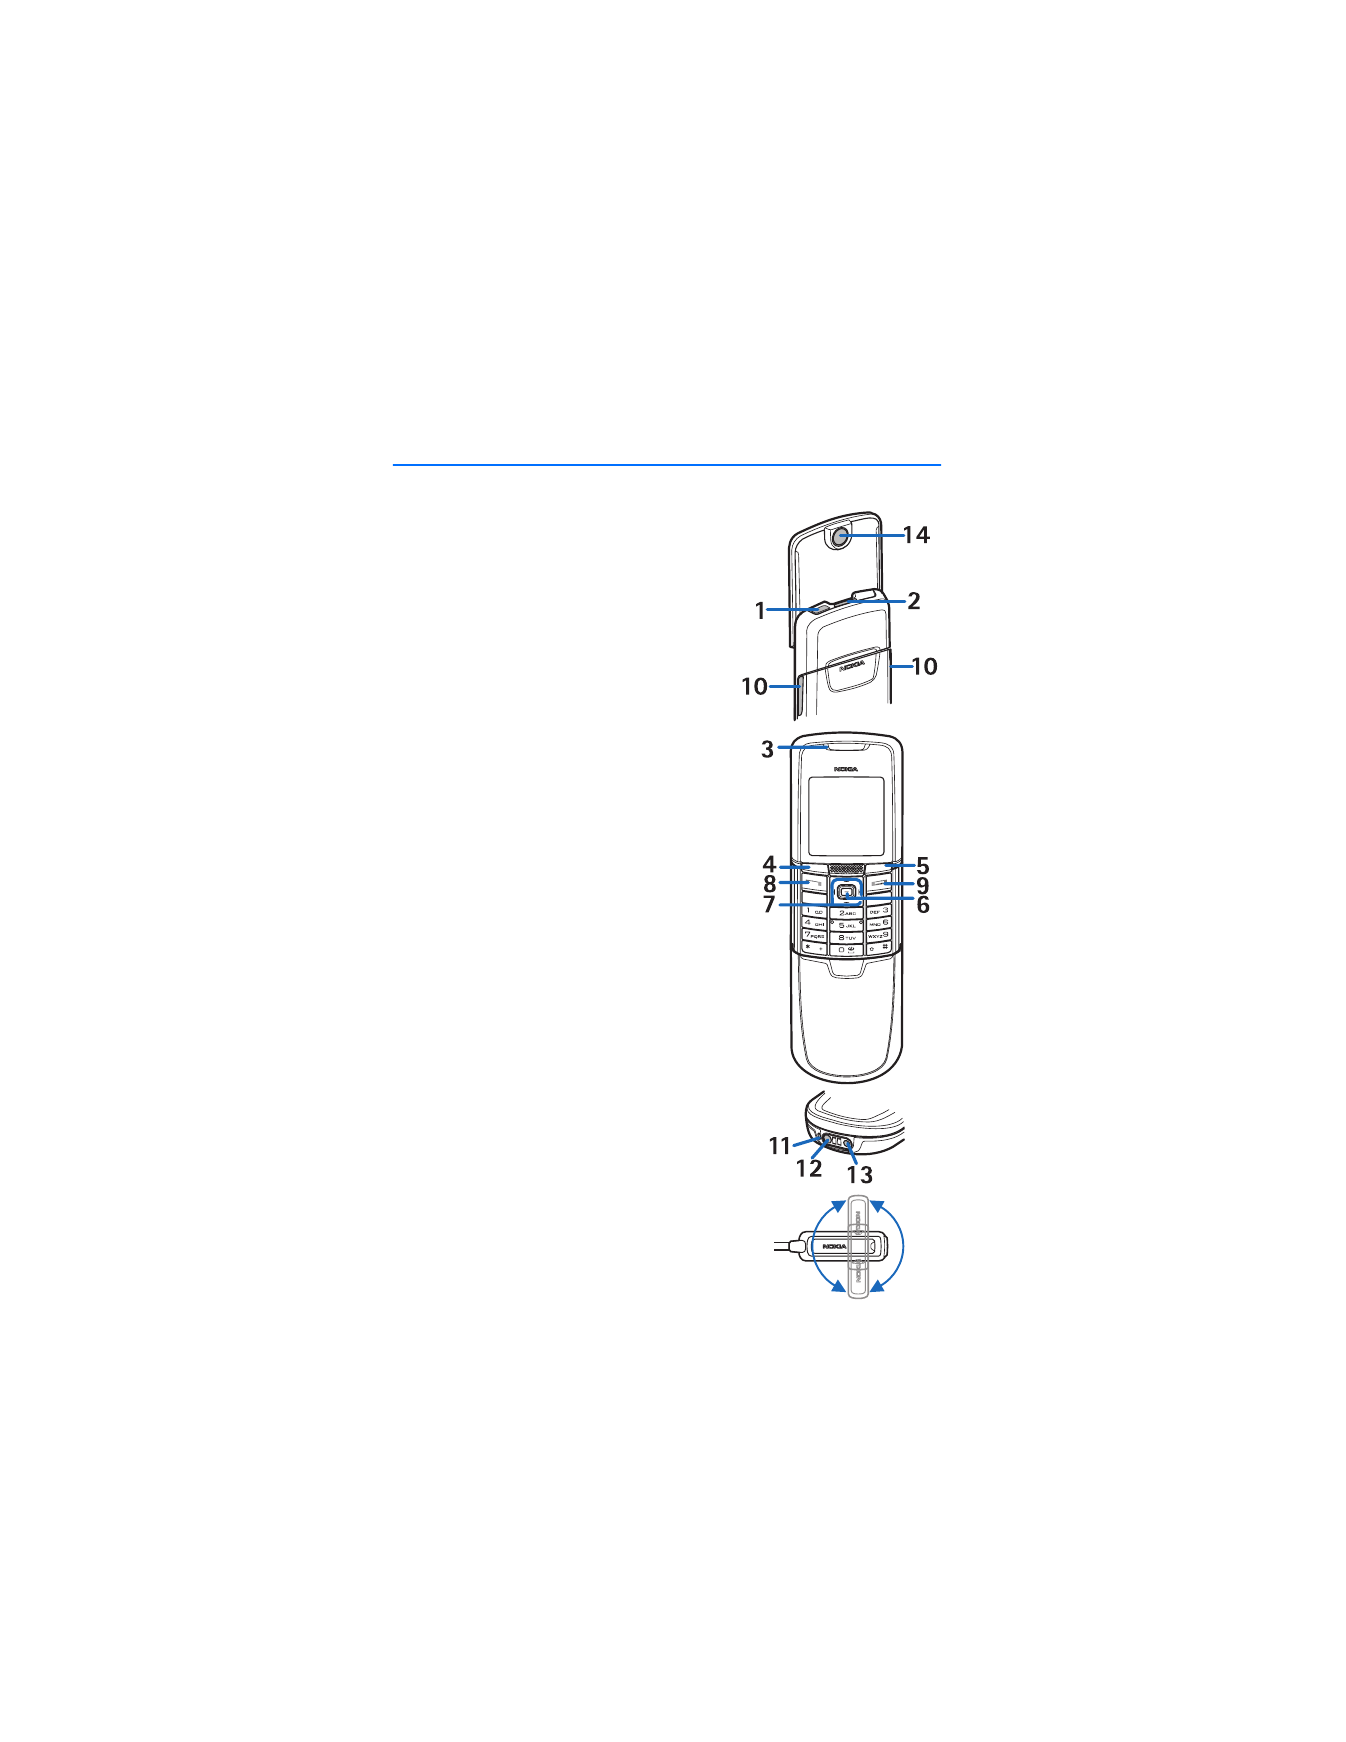
2. Getting started
■ SIM card installation
Keep all SIM cards out of the reach of small children. For availability and
information on using SIM card services, contact your SIM card vendor. This may
be the service provider, network operator, or another vendor. Before installing
the SIM card and removing the battery, always make sure that the phone is
switched off and disconnected from any enhancement.
The SIM card and its contacts can easily be damaged by scratches or bending, so
be careful when handling, inserting, or removing the card.
To install the SIM card:
1. Push the sideways release buttons to
release the back cover of the phone.
2. Slide the back cover to remove it from
the phone.
3. Unlock the battery for the Nokia 8801
phone. See "Battery lock" on page 11.
Remove the battery, as shown in the
illustration.
4. Insert the SIM card into the SIM card
holder as shown. Make sure that the gold
colored contact area on the SIM card is
facing downwards.

G e t t i n g s t a r t e d
11
5. Position the
battery so the
gold colored
contacts match
up with those on
the phone. Insert
the battery,
contact end first
into the battery
slot. Snap the other end of the battery into place. Lock the battery for the
Nokia 8801 phone. See "Battery lock" on page 11.
6. Slide the back cover into place.
■ Battery lock
The battery lock feature allows the phone battery to remain securely in place. The
battery lock is only available in the Nokia 8801 phone.
•
To lock the battery, push the battery lock mechanism to the right (1) until it
locks into place (2).
•
To unlock the battery, push the battery lock mechanism to the left until it unlocks.
■ Charge the battery
Warning: Use only batteries, chargers, and enhancements approved by
Nokia for use with this particular model. The use of any other types may
invalidate any approval or warranty, and may be dangerous.
This device is intended for use with the BL-5X battery. Always use original Nokia
batteries. See "Nokia battery authentication guidelines" on page 81.

G e t t i n g s t a r t e d
12
Check the model number of any charger before use with this device. This device is
intended for use when supplied with power from the ACP-12 charger.
For availability of approved enhancements, please check with your dealer.
1. Connect the charger to a standard
wall outlet.
2. Insert the charger plug into the
round jack in the bottom of the
phone. If the battery is completely
empty, it may take a few minutes
before the charging indicator
appears on the display or before
any calls can be made.
3. Disconnect the charger from the
phone when the battery is fully
charged.
You can use the phone while the charger is connected. The charging time depends
on the charger and the battery used. For example, charging a BL-5X battery with
the ACP-12 charger takes approximately 1 hour and 5 minutes while the phone is
in the standby mode.
■ Turn the phone on and off
Press and hold the power key as shown. If the phone asks for a
PIN, enter the code, and select
OK
.
When you turn on your phone for the first time, the phone is in
standby mode (see "Standby mode" on page 15) and a query
appears, asking for the configuration settings from your service
provider (network service). Confirm or decline the query.
See "Configuration settings service" on page 9.
■ Open the keypad
1. Hold the phone in one hand.
2. With the other hand, press your thumb on the part of the
phone that is below the display screen.
3. Push the top part of the phone (slide) upwards, as shown in
the illustration.

G e t t i n g s t a r t e d
13
■ Normal operating position
Use the phone only in its normal
operating position.
Your device has an internal antenna.
Note: As with any other radio transmitting device, do not touch the
antenna unnecessarily when the device is switched on. Contact with the
antenna affects call quality and may cause the device to operate at a
higher power level than otherwise needed. Avoiding contact with the
antenna area when operating the device optimizes the antenna
performance and the battery life.

Y o u r p h o n e
14